
Fermentation has been a culinary art for centuries, cherished for its ability to preserve food and enhance flavors. From tangy sauerkraut to creamy yogurt, this ancient technique has re-emerged in modern kitchens, inviting both novice cooks and seasoned chefs to experiment with probiotic-rich delights. If you’re intrigued by the idea of fermenting at home but unsure where to begin, this guide will walk you through the essential steps and offer tips to ensure your fermentation endeavors are successful.
Understanding Fermentation
At its core, fermentation is a natural process that converts sugars into acids, gases, or alcohol using microorganisms like bacteria, yeast, and molds. These tiny organisms thrive in anaerobic (low-oxygen) environments, transforming food into delicious, shelf-stable products. This process not only preserves food but also enhances its nutritional profile, making it easier to digest and often increasing its probiotic content.
Why Ferment at Home?
- Health Benefits: Fermented foods are rich in probiotics, which can support gut health and boost your immune system. Regular consumption can improve digestion and may even enhance mood.
- Flavor Development: Fermentation adds complex flavors to foods, resulting in unique tastes that you can’t find in store-bought versions. Think of the tangy zip of kimchi or the rich depth of sourdough bread.
- Sustainability: Fermenting at home encourages the use of seasonal produce and reduces food waste. Instead of discarding surplus fruits or vegetables, you can turn them into flavorful ferments.
- Cost-Effectiveness: Making fermented foods at home is often cheaper than buying pre-packaged versions. Plus, you have control over the ingredients, allowing for healthier options free from preservatives and additives.
Getting Started: Essential Tools and Ingredients
Before diving into the fermentation process, gather the necessary tools and ingredients. Here’s what you’ll need:
Tools
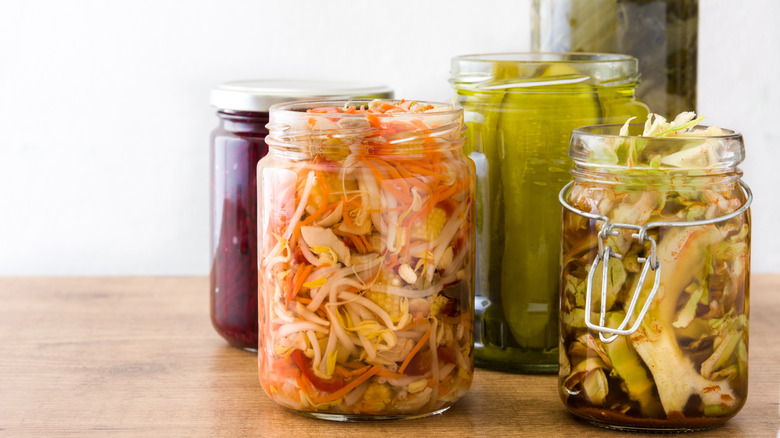
- Fermentation Vessels: Glass jars with tight-fitting lids or fermentation crocks work best. Avoid metal containers as they can react with the acidic environment created during fermentation.
- Weights: If you’re fermenting vegetables, weights can help keep them submerged under the brine, preventing exposure to air and potential spoilage.
- Airlocks: For brewing or making certain types of ferments, airlocks allow gas to escape while keeping out oxygen and contaminants.
- Measuring Tools: Accurate measuring cups and spoons are essential for ensuring proper salt ratios, especially in vegetable ferments.
Ingredients
- Base Ingredients: The possibilities are vast, from vegetables like cabbage and cucumbers to fruits like apples and berries. Choose fresh, organic produce whenever possible.
- Salt: For vegetable ferments, non-iodized salt is preferred. Sea salt or kosher salt works well, as iodine can inhibit fermentation.
- Starter Cultures: While many ferments can develop naturally from the microorganisms present on your ingredients, you may opt for starter cultures like whey or commercial probiotics for consistent results.
Basic Fermentation Techniques
Vegetable Fermentation
One of the simplest forms of fermentation is pickling vegetables. Here’s a basic method to get you started:
- Prepare the Vegetables: Chop or shred your chosen vegetables (cabbage, carrots, etc.) and place them in a mixing bowl.
- Add Salt: Sprinkle salt over the vegetables. The salt draws out moisture and creates a brine. Use about 1-3 tablespoons of salt per quart of vegetables, depending on taste.
- Massage the Vegetables: With clean hands, massage the vegetables until they release their juices, creating a brine.
- Pack the Jar: Transfer the mixture into a sterilized jar, pressing it down firmly to ensure it’s submerged in the brine. Leave some headspace at the top.
- Seal and Store: Seal the jar with a lid or airlock and store it in a cool, dark place. Check daily for signs of fermentation (bubbles, fizzing) and taste it periodically until it reaches your desired flavor.
Fermented Beverages
For those interested in beverages, kombucha is a popular choice. Here’s a basic approach:
- Prepare Tea: Brew a strong batch of black or green tea and dissolve sugar into it. Let it cool to room temperature.
- Add SCOBY: Once cooled, pour the tea into a glass jar and add a SCOBY (Symbiotic Culture of Bacteria and Yeast) along with some starter liquid from a previous batch.
- Cover: Cover the jar with a cloth to allow airflow while keeping dust out. Secure it with a rubber band.
- Ferment: Let it sit in a warm, dark place for about a week. Taste periodically until it reaches your preferred level of tartness.
Troubleshooting Common Issues
Fermentation can be a bit unpredictable, especially for beginners. Here are some common issues and solutions:
- Mold Growth: If you notice mold on the surface, remove it promptly. If the food beneath appears unaffected, it’s generally safe to consume.
- Off Smells: A strong, unpleasant odor may indicate spoilage. If the smell is rancid or foul, it’s best to discard the batch.
- Insufficient Fermentation: If your ferment isn’t bubbling or developing flavor, check the temperature. Fermentation often slows down in cooler environments.
Embrace the Adventure
Embarking on the path of home fermentation opens up a world of culinary exploration. With practice, you’ll gain confidence and discover new flavors and techniques. The beauty of fermentation lies in its simplicity and adaptability. So, gather your ingredients, set up your tools, and let the microorganisms work their magic. With patience and creativity, your kitchen can become a hub for delicious, healthful, fermented delights.
